31.7.07

Helmet

This is Einar's helmet and it's a copy of the 10th century helmet which was found in Gjermundbu in Norway. This particular helmet was excavated with chainmail protection attached to it but only at the back.


A helmet with chainmail attached to it completely like you see here was found in Valsgarde in Sweden but it is dated roughly 200 years before any "real" viking activity.
This helmet is very effective on the battlefield where safety is concerned.


The book "Die Wikinger" by Nurmann, Schulze and Verhülsdonk (isbn 3-932077-01-6) shows these helmets on page 28. The book is also available in English.

30.7.07

We sleep like babies...

... in this bed...

This is one of Einar's projects from last year, making a bed-frame.

I have to be honest with you folks, but I know zip about wood. If I am to believe Einar then this is a relatively easy bed-frame to make.

You need four planks of sturdy wood, four pegs and four "side-wings" which you can decorate or not. This is again a technique found on the Queen's bed on the Oseberg ship.
Our bed is resting on the ground and hides our beds and sleeping bags pretty well, but I suppose the bed could have legs as well.

Here's an excellent link on Viking beds: http://www.ravensgard.org/gerekr/bed.html

Our chairs


Here's a photo of the two chairs Einar made last year. We have no historical proof these chairs were ever used since none resembling these were ever excavated, however, Einar has used the same technique which was used for the bed found on the Oseberg ship. In the background you can see our bed too.

Here's Lars doing some woodcrafting of his own, seated on one of the chairs.

click on the photo to get a bigger picture

Cooking


We hope to be able to publish some of our favourite recipes here in this section, just click on Cooking! There will be plenty of veggi recipes too =)

What you see here is a simple bacon-pancake...surely you know how to make those!

Toiletries, part 1

Most women I have seen in Viking camps use baskets to keep their toiletries. It looks very cute, yes, but for some odd reason it does not work for me. I always seem to lose things from the basket so I need something with an authentic look that can be closed.

Of course nothing even remotely resembling Viking toiletries has ever been excavated and if I think of that scene in "The 13th Warrior" where they all share a bowl of water to clean faces and noses it still makes my flesh crawl... so I've come up with the following solution.

I bought one of those round wooden boxes you can find in almost any craft shop. I took one of the bigger ones, big enough to hold all those essential items you need to become a nice clean viking...

Then I took a bit of fabric which was left of Lars's small kaftan. It is a really thick wool so sturdy enough to make a nice big toilet pouch. The round box fits perfectly inside.

This is what it looks like so far, I still intend to decorate the top and perhaps make a nice tape woven trim to make it less boring.

I did not use a lucet to make a cord, instead, I braided three strands of wool together. I actually like braiding because you can use many different colours and my lucetting skills are not so fantastic at the moment... I am sure you will be able to forgive me.

Also, I recommend that you use a water sealer on the wooden box (inside and out!) so that it's protected from any leaky bottles and such....

29.7.07

Nice knife sheath

For his own dagger Einarr made this sheath. The happy little bronze goose foot you see attached to it, is not really male viking jewellery but it looks quite cute nonetheless.

Again, click on the photo to get a larger picture.

Leather pouches by Einarr

Click on the photos to get a larger picture!


Einarr made several leather pouches over the past few years and here are some of the ones he made. The one you see hereabove is my own pouch!

This pouch is based on an excavated pouch found at Sutton Hoo.


This pouch was made for the friend of a friend, no seriously!

Our new kitchen chest, made by Einar

Einar was not completely happy with our old "kitchen chest". First of all, it was not authentic at all... although it had an authentic look, and second it was just too heavy even when empty!

He decided to make a new chest over the weekend and here's the result. You will notice that the lid was inspired by the Mastermyr chest and the bottom was inspired by the Oseberg chest.


The iron hinges were bought from our Danish Viking friend Sören Nordekjaerd.

Here's a nice photo of the Oseberg chest. The original you see hereunder is on display in the Viking Ship Museum in Oslo, Norway.

Bits 'n pieces bag

The thing with making Viking clothes, or any other type of clothes for that matter, is that when the garment is finished there are a lot of left-over bits and pieces of the fabric. After making several costumes I ended up with a basket with a lot of remnants and since (to my knowledge) Vikings didn't quilt I decided to use the rest of a winter tunic and what was left of Einar's legwraps into a bag


The broad leg wraps make this a comfy bag to carry around sore shoulders. After weaving and cooking all day, Viking women deserve comfortable shoulder straps, yay!

The tablet woven trim is not fantastic, but it's alright for a bag. This was just a trial piece for a nice trim I want to make for one of Einar's tunics. I've used a simple cotton here and as you can see it starts to wear quickly. The colours are white and burgundy. I am not going to use cotton on Einar's tunic, we are still looking for nice wool.

I've been playing hookey with this bag, to be honest, because I sewed a zipper inside to make sure my camera and such stay where they should stay.... inside the bag.... I've seen too many "accidents" with bags which were a bit too authentic. Well, I prefer to keep my belongings!

16.7.07

First REAL naalbound project!!

I'm so proud I'm about to explode!! You know I'm not very clever when it comes to naalbinding so I am very happy that I was able to make and finish this pouch in only two days, yay!

I've worked with a simple Danish stitch and the pouch is 14 cm high and 8 cm in diameter so big enough to hold keys or other modern items you want out of the way.

The wool is greyish/brown with white and it is again a little bit of left over wool my mother-in-law gave me, the orange is also cheap & simple wool... I had a few strands left to pimp this pouch up a bit :D

15.7.07

A happy day in Archeon

We went to Archeon again, this photo was taken from the Dorestad house, looking out on the medieval Dam Street just across the water, or river. It is very idyllic!


Our "roommate" for the day, Archeo-guide Yvonne, is doing some tablet weaving here, just like me. Yes, yes, we do get along folks, no worries, but sitting back-to-back turned out to be the only practical way to do our crafts at the same time :D

And Einar is busy with his leather crafts! How do you like our tiny little Dorestad house?

New purple tunic in action

I finally managed to put the new tape woven trim on my purple tunic and here you can see me wearing it in Archeon, whilst doing some tablet weaving :D


Of course he wasn't tired... Whitsun Eindhoven 2007

As the song says, Christmas "is the most wonderful time of the year" and although we enjoy the Juletide, Whitsuntide is an even happier time for us because the Open Air Museum in Eindhoven holds their annual Viking market. And a market it IS folks! You can buy almost anything there.
Little Lars came with us this year and he had a great time. At the end of the day, when the market was already closed, he STILL insisted on going shopping... because he was not tired at all, no ma'am, nah not tired.....

riiiiight......


Leg wraps

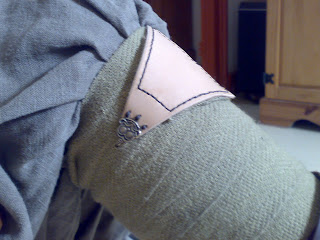
Einar bought some leg wraps last year and although they were alright just the way they were, I bought him some cute copper hooks to attach to his wraps. He sewed leather endings to the ends of his wraps and then attached the hooks. I think this looks very smart!

11.7.07

A nifty thing to build a fire in

Sometimes you come to a museum or event and you are not allowed to build a fire straight from the ground, and believe me that can be quite a drag! You´re a viking, right? So you want your fire...
Not long ago I found a website called Heine Shop where they sold these large bowls as `garden fire grate` or simply as `flower pot`... well....pot is not the right word in my opinion but who cares because now we have a nifty iron fire grate to have a cozy fire in.


The good news is that these things are BIG, the diameter is 59cm, and they are hand made so they have a real authentic look. The bad news is that they are a tad bit expense, 139 euro. But they work and I think they are worth your investment.

9.7.07

Early sock... or the beginning of it...

Last year my mother-in-law gave me some left over wool. The colours were excellent, with many shades of orange and brown and grey. It's not authentic looking wool of course, but I'm sure you won't blame me for using it on what was supposed to be the beginning of my first naalbound sock!
I can't finish this sock because there wasn't enough wool but I'm fine with that. After all this was just for practise and it doesn't look bad at all.

I've used the simplest stitch you can find in naalbinding: the "blanket" stitch. This is it really what it comes down to ... practise, practise, practise, practise...


4.7.07

Finally getting the hang of it....I think...

Last year I bought one of Candace Crockett's books on Tablet weaving. From day one I had my eye on a lovely pattern, made up of only 11 cards. The design is by Bettie Adams and all my research on Internet has given me zip on this lady, so all I can do is give her credit here for this pattern. The book was first published in 1973 and although I was already on the planet in those days I sincerely hope both Candace and Bettie are still with us too!!

I have a rather dull brown hangarok (if you click on the Lindisfarne entry you can see me wearing it) and it really needs some spicing up with a nice tablet woven trim. I am using two bright colours of orange, light and dark and white in the middle. It's cheap wool and one of the downsides is that it sticks together continuously but hey, I am still an apprentice in this craft...

Below is the pattern, click on the image to enlarge. I'll add a photo of the hangarok when it's done :D